Friday, March 30, 2012

Everyone's Favorite Chocolate Chip Cookie


    I was at lunch with some old friends yesterday.  We were discussing our favorite treats among many other things.  Of course we all love mini Cadbury eggs but classic old Chocolate Chip Cookies was a winner.  Now these cookies are not going to change the world but I guarantee you will love this recipe as much as my family does.
    A few things I think make these cookies the best are real butter, Mexican vanilla and Guitard milk chocolate chips(they are slightly larger than regular chocolate chips).  I also personally prefer semi-sweet but my husband loves milk chocolate.  Another fun choice is to do half milk chocolate and half butterscotch.

Everyone's Favorite Chocolate Chip Cookie

1 cup butter (yes real butter)
3/4 cup brown sugar
3/4 cup granulated sugar
1 egg
1 teaspoon vanilla ( I use Mexican Vanilla)

2 1/4 cups flour
1 teaspoon  baking soda
1/2 teaspoon salt

2/3 of a bag of chocolate chips
1/2 cup of walnuts (optional)

Cream together butter and sugars, add egg and vanilla.  
Sift together flour, salt and baking soda.  Mix into butter mixture.  Add chocolate chips and nuts.

Preheat oven to 375 degrees.  Bake for about 10 min.

 enjoy!

                   xo, Tami

Monday, March 26, 2012

Lime Is Divine


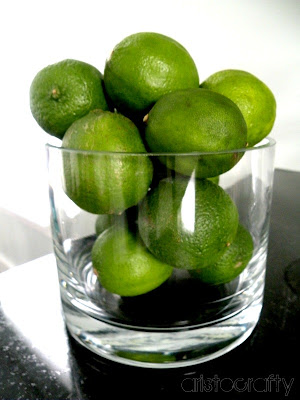
Do you shop Costco?  And do you buy stuff that you can't possibly go thru in a week before it goes bad?  We do too.  Now, if I had two more kids or bigger kids with bigger appetites I would probably be ok.  We bought a bag limes last weekend to make our lime beef roast and hadn't touched them since.  So, today I thought I'd use them up before they go hard and make my husband's favorite dish, Honey-Lime Enchiladas from The Sisters Cafe blog.  I found the recipe over a year ago and make it every once in a while when I really want to spoil Chris. (wink wink!)  Then for dessert I tried a new recipe I found on Pinterest.  And can you say YUM!


Honey Lime Enchiladas

6 Tbsp Honey
4 1/2 Tbsp Lime Juice
1 Tbsp Chili Powder - I do a little less for my kids.
1/2 Tsp Garlic Powder

1 lb. Cooked Chicken, shredded
Flour Tortillas
Shredded Cheese
10 oz. can Green Enchilada Sauce

Mix first 4 ingredients together and toss with shredded chicken.  Let it marinate for atleast a half hour.  Lightly grease a 9x13 pan.  Fill flour tortillas with chicken and cheese.  Pour enchilada sauce over enchiladas and sprinkle with more cheese.  Bake at 350 degrees for 30 mins.  Put it under the broiler at the end to make the cheese brown and crispy on the top.  I always forget to do this!


Lime and Coconut Crumble Bars


We love lime and coconut at our house so this is the perfect little number for us!  It's quick to make and was a nice Sunday dessert.  I think it would be even better with a small scoop of vanilla bean ice cream!  Click here to find the recipe.

                                                                            xo
                                                                       Melanie,
                                                                   lover of lime.

Sunday, March 25, 2012

Happy Anniversary

                                                                       (It was a spring blizzard and I had to scan this photo....so it's not quite clear.)

Today we've been married seven years!  I had someone ask me if I had the "7year itch".  It's quite the opposite.  Over the years I've been grateful for Chris, but lately I am more grateful than ever for my husband!  He's a real stand-up guy.  Full of integrity, character, wisdom, intelligence and humor!  I once said when we were engaged that I love that he makes me laugh.  Really laugh. Like tears roll down your eyes laugh!   It's why I fell in love with him at first.  And he still makes me laugh.  We were laughing the other day with my SIL and she said "do you guys always laugh like this?"  YES!  Honestly, being married to Chris is so delightful.  Of course, we aren't exempt of trials and rough spots but we seem to get thru them stronger than before and hopefully better.  Happy Anniversary Babe!  I'm one lucky girl! xoxoxo


                                                                               (My kids bent this picture......gotta love how kids ruin your stuff!)


Thursday, March 22, 2012

Craving Navy and White


Are any of you itching to change things up in your home decor?  I totally am!  Everywhere I look I am drawn to navy, white, indigo blue and red.  My house is pretty light and pastel with light blue walls and accents of gray,black and white everywhere.

I've moved on.

 I know I love navy and white.  It's an instant classic combo that is really hot right now. Over the next few weeks I'm going to be changing things up in my house, nothing that a can of paint or a yard of fabric can't do.  It's nothing major (I wish it was) but I'm excited nonetheless.  I want to do it now and be done by the weekend, but alas, I have too many things on my plate that can't be put on hold.

Here are some inspiration pictures....


I love these rooms because although they are navy and white they don't seem nautical or beachy which is nice!  

Here's another inspiration pic, me at the pool?  If I starve myself for the next year and get a tan?  It could happen.  I at least want that shirt.


What color palette inspires you?

Melanie


Tuesday, March 20, 2012

Carrot Cake


 I made carrot cake today and it's good.  Real good.  I was craving it since last week when my MIL made some and I was on a detox diet so I never tasted it.  It's been haunting me for days.  Are you like me??  Well, I'm still detoxing but I had a bite and let's just day it wasn't small.  I had to do it or else I might not have been able to think about anything else.  Again, does yummy food do that to you?  Maybe it's because I'm not eating yummy food.  humph.


I frosted it before it was completely cooled.  So, it's not looking so pretty but boy does it taste divine!  I think next time I make these I'm doing them in cupcake form or in a 9x13.  My cakes sunk in the middle a bit and that's never fun when you're baking because stuff should always turn out beautiful.  Cupcakes aren't as sensitive and always look pretty to me.  And they're great for portion control!  

Carrot Cake from The World Wide Ward Cookbook

2 C. Sugar
1 1/2 C. Oil
4 Eggs
1 C. Flour
1 C. Whole Wheat Flour
2 tsp. Baking Soda
1 tsp. Salt
1 tbsp. Cinnamon
2 tsp. Vanilla
3 C. Carrots - grated
3/4 C. Pecans - chopped
1 C. Raisins - I left them out
1/2 C. Pineapple - crushed or use applesauce
3/4 C. Coconut flakes

Mix sugar and oil. Add eggs and beat well. Sift flours and other dry ingredients and add to wet mix and beat well.  Add vanilla and carrots.  Fold in nuts, raisins, pineapple and coconut.  Grease cake pans. Bake at 325 for 45 minutes.  Let cool, frost and serve.

Cream Cheese Frosting

1/2 C. Butter
8 oz. Cream Cheese
1 lb. Powdered Sugar
1-2 tsp Vanilla

Beat together. Lick the spoon.


On a side note....this is how we roll!  We just had playdates today so I didn't try to persuade her to change.  I love age three.  It's.so.stinkin'.cute!


                                                                               xo
                                                                          Melanie

Monday, March 19, 2012

Crockpot Lime Beef Roast


We like to use our crockpot on Sundays.  Nothing is better than coming home from church, taking a nap and when you wake-up dinner is ready!  My friend and neighbor brought this dinner to us when I had my last baby and we.were.hooked.  And I think you will be too!  It doesn't look pretty until it's shredded but we ate it (with our friends) before I could snap a picture.


Crockpot Lime Beef Roast

One Beef Roast - any will do, chuck, shoulder, round eye, on sale etc.
5-6 Limes
Beef Base - found in the soup aisle
Montreal Steak Seasoning

Coat the roast on all sides with the beef base (be generous but not cakey).  Sprinkle with Montreal seasoning.  Put in crockpot.  Squeeze limes over roast and cook on low for 8 hours.  If you cook it 5-6 it usually isn't easy to shred, that comes around 7-8 hours!

Serve with:

Tortilla - we use the kind from Costco that you cook
Lime-Cilantro Rice (see below)
Cheese
Sour Cream
Guacamole
Salsa


Lime Cilantro Rice


2-3 cups rice (we use Calrose but you could use long grain, brown)
1/2 bunch cilantro chopped
Juice from two limes
salt to taste

Nothing fancy but it's quick and easy.  Make rice according to directions.  When it's done add cilantro, lime juice and salt.

                                         
What are some of your favorite Sunday meals?

Melanie


Friday, March 16, 2012

St. Patrick's Day and A Winner!


My kids have been talking about the "Leprechaun" since the day after Valentine's Day.  Seriously?  Who told them about it?  I guess we're celebrating St. Patrick's Day at my house now.  It's not that I don't like celebrating any old occasion but I've NEVER celebrated March 17 and would rather just skip from my Valentine's decor to Easter because I have no St. Patrick's Day decor anyway.  I almost made a banner this year but I really didn't want to take down my Easter stuff.  So instead, we'll just do some leprechaun pranks and have some fun treats! I have some fun cupcakes and cookies in my mind that I want to make, if they turn out I will post them next week.   I did age appropriate and taste preference treats for my family.  For my husband I did Peanut Butter M&M's because he's a PB freak, Skittles for my girls and Trix for my baby (I wanted fruity Cheerios but Harmon's doesn't sell them!)  You can't see in this picture but I stacked a few gold coins at the top of the rainbow.  


Now on to the winner.......Thank you everybody who entered the giveaway, it's nice to see so many supportive readers as we start this new adventure here at Aristocrafty!

So the winner of our very first giveaway is:      Anne Marie McDonald  YAY!

                                         Have a great weekend and enjoy your St. Patrick's Day!
                                                                       Melanie


Thursday, March 15, 2012

Coconut Lemonade


I heart coconut!  Really truly, I can't get enough of it.  A dear friend introduced this to me a few years ago and it's one of my favorites to sip on in the summer on my porch.  There are some modifications you could make, for instance use already made lemonade or Country Time lemonade or Crystal Light instead of fresh squeezed.  We do that a lot because it's quick and we always have it on hand unlike lemons.  You can get Torani syrup at a restaurant supply store.  

                                                               
 My kids love it too!  They told me yesterday that I was the best mom.....maybe it could work for you?  hahaha!  I love how easily bought my kids are but then again they are 5, 3 and 1.  Their standards are still pretty low.  Lucky me!

Speaking of lucky.....we will announce the winner of our Easter garland giveaway tomorrow so be sure to enter and check back to see if you are the winner!  Also, I've joined a link party at Uncommon,  check it out for some other great ideas.


Coconut Lemonade


3 cups warm water
2/3 cup fresh lemon juice
1/2 cup sugar
2 tbsp Coconut Syrup - like Torani or cream of coconut
1/2 cup frozen blueberries
1/2 cup frozen raspberries

In large bowl combine water, lemon juice, sugar and coconut syrup.  Stir until sugar is dissolved.  Cover and refrigerate 4-24 hours (I do about 30 mins if I do fresh squeezed, otherwise there is no need.)  To serve, add berries and serve over ice cubes.

                                                                            xo
                                                                          Mel


Wednesday, March 14, 2012

DIY Decorative Magnet Board


I found this beautiful frame in my parents mechanical room behind a water heater covered in dust when they sold our family home of 30 years six years ago.  Whew, that's a mouth full!   I knew what I wanted to do with it.   I gave it a coat of paint and a light sanding and turned it into a decorative magnet board.  I get a ton of comments/compliments on it from people who visit my home.  


See how "cute" my clutter looks?  And don't think I didn't take down 8 coloring pages from my kids before I took this picture.

Here's how you make one yourself: 

1. Start with a frame (no glass), the size I like is 2'x3'.  You can find them at Hobby Lobby, Michael's etc (use a coupon or wait for a sale of course!).  This particular frame is for my husband's grandparents.


2. Get some sheet metal.  I buy mine at Lowe's, $10 for a 2'x3' then you don't have to cut it which can turn into a mess and leave it with jagged edges that don't lay flat.


3. Get some glue.  Not any glue, I've used Goop, Gorilla Glue etc. and most of them make a huge mess or don't dry effectively.  I use this particular brand and love it because the nozzle makes it easy to control the glue and it dries great.  I know they sell it at Hobby Lobby.


4. Squeeze it on the flat edge but not too close to the edge so it won't squeeze over onto the front side of the frame.  And don't squeeze too much glue, it'll be a disaster.  


On a side note.....Don't do your project on your painted dining room table or at least put some newspaper down or else your table could end up like this.  (I was multi-tasking while I was making dinner and I do have a 15 month old mama's boy so you can imagine I was trying to hurry and while doing so, well, I ruined my table.)  Ugh and doh!


 5. Put the sheet metal in.  You may need to fix any bent corners before you slip it in and weigh down and edges that aren't laying flat.  I use my 2 lb. weights and they work perfectly.
Let dry overnight. 


6. Hang your pictures and other stuff or in this case, wrap it up!


I made some for my mother-in-law a few years ago and three of them hang down a hall to house all her grandkids pictures and art work.  She often mentions to me how much she loves them!  For Christmas this last year I gave one to my dad (a black carved frame) and I think it's the perfect gift to give someone who has everything or doesn't want anything at all...that was my dad and he loved his gift!  


                                                                Don't forget your coupon!
                                                                                   xo
                                                                                 Mel

Tuesday, March 13, 2012

Butterfly Shadow Box


These little butterflies make me happy.  I switch out my shadow boxes a couple times a year but these are my favorite because they are so colorful and represent Spring!   Speaking of Spring, it's right around the corner and lately it seems like it's here and that makes me even more happy!  
I cut them out on my Cricut using the Storybook cartridge.  I know you could probably use a butterfly shaped punch too.  Super easy and cheap because I used scraps!  The shadow boxes are from Pottery Barn and I've seen them at Target as well.  


Remember that our giveaway is still going on, so there is still time to enter!

                                                                 Melanie

Monday, March 12, 2012

First Giveaway - Easter Garland


It's our very first giveaway here at Aristocrafty and we are so excited!  To launch us into this giveaway  we are starting out with this festive Easter garland that could be hanging in your house very soon!


Here's what you need to do:

1. Like us on Facebook

2. Share our blog on your FB page.

3. Leave a comment that you have done these things and you will be entered into the drawing!

We will be announcing the winner on Friday, so check back!

We will ship this garland anywhere in the world!

                                                                          xoxo
                                                                 Melanie & Tami


Sunday, March 11, 2012

Lessons I Learned as a Boy


I love this video, such a simple but profound lesson and I love hearing Pres. Gordon B. Hinckley's voice, I just loved him so much. xo Melanie

Friday, March 9, 2012

Lemon and Strawberry Cookies


Pretty lil' things eh?  And they taste divine too!  At first glance you might say this is my cheap and lazy version of a macarons.  Speaking of macarons, I've never tried one.  I was going to buy one for $2 at a gift show but my frugal side got the best of me and I passed it up.  Wish now I hadn't listened to her.  I hear they are delicious pretty little things.  I would like to to try to make them, do you have a recipe?  Have you made them yourself?  I'd love to hear all about it.  They look a little tricky.  Ok, enough about that.

These cookies are cheap and easy!  I've been making oreo cookies out of a cake box for almost 20 years and they are my favorite cookie next to my oatmeal cookie.  A few years ago for Easter I made them out of a lemon cake mix and they were an absolute hit!  Who doesn't love lemon?  I tried them out of a strawberry cake mix yesterday thinking the pink and yellow would make a lovely presentation for an Easter party, a tea party or any spring or summer occasion.  I was totally right!


Lemon or Strawberry sandwich cookies

One cake mix of lemon or strawberry (or devil's food cake if you want to go chocolate!)
2/3 cup butter crisco
2 eggs

Mix all ingredients together until well combined.  Roll into balls and bake on metal cookie sheet - NOT on a dark non-stick cookie sheet otherwise they will bake up brown...trust me this happened yesterday! Bake at 350 degrees for 10 minutes.  Frost with cream cheese, lemon or strawberry frosting.  I did lemon and strawberry for color but you could dye cream cheese for the the same look but a little better taste in my opinion.


                                                                xo
                                                            Melanie

Thursday, March 8, 2012

So Yummy! Homemade Coconut Syrup on French toast


If you are craving something tropical or are in the mood for a yummy breakfast this Syrup is truly the best!  My family craves it!  In fact I joke with my kids that they have more syrup on their plates than french toast.  This coconut syrup is so easy to make.  It only takes about 5 - 10 minutes.  Please give it a try and let me know what you think.  I promise you will not be disappointed!

Coconut Syrup Recipe

1/2 cup butter
1 1/2  cups sugar
2 Tablespoons corn syrup ( sometimes I do not use this)
3/4 cup milk
1 teaspoon baking soda
1 Tablespoon Imitation Coconut extract

In a large saucepan over medium-high heat, bring butter, sugar, corn syrup, milk and baking soda to a boil.  Reduce heat and simmer, stirring constantly a couple of minutes.  (Mixture will bubble up, so be sure to use a large pot)  Remove from heat and carefully stir in the coconut extract.

Pour it on pancakes, waffles, ice cream, bread pudding...or anything else you would like!
Enjoy!
XO, Tami


Wednesday, March 7, 2012

Oatmeal Cookies and an award too!


I was talking to my mom on the phone the other day and she asked me what I was doing, I said "baking cookies".....her response, "you bake a lot".   Um...ok, so I bake 2-3 times a week,  it's one way I show love to my little family.  Is this excessive??  Please tell me how often you bake for your family.  By the way, my mom wasn't being mean, she's far too sweet for that!

WARNING:  These cookies WILL make you fat....because you CANNOT stop at one.  Atleast I know I can't and numerous friends and my SIL have confessed they can't either.

Oatmeal Cookies (adapted slightly from Favorites cookbook)

1 C. Butter
1 C. Sugar
1 C. Brown Sugar
2 Eggs
2 tsp Vanilla
1 tsp Salt
1/2 tsp Baking Powder
2 tsp Baking Soda
2 1/4 C. Flour
2 C. Oats
1 package Semi-Sweet Morsels

Cream together butter and sugars. Add eggs and vanilla and mix well.  Add salt, soda, powder, flour and mix just until combined.  Add oats and morsels and mix with a wooden spoon.  Bake at 350 degrees for 10-12 minutes (I do 10 mins.)  Enjoy with milk!


Now on to the award,  I'm honored to receive the Liebster Award from Shannon over at Sew Sweet Cottage, thanks my sweet friend!  Her blog is a collaboration of DIY projects and creative parties, check her out!


I am passing the award on to some other fabulous blogs, check them out!

Natalie at SeeJaneScrapbook
Jeanne at SimplySacred
Karen at Giggle Goat


p.s I froze half of the oatmeal cookies so we wouldn't feel obligated to eat all of them before they went hard!


xo
Melanie

Tuesday, March 6, 2012

All that glitters


I got the Martha Stewart glitter set for Christmas and have been wanting to glitter something ever since!  I bought an elk figurine on clearance and thought it would look cool in white glitter for Christmas but haven't done it yet.  So...we decided to glitter some cheap plastic toys laying around the house.  I say "we" because my girls glittered these horses (with the help of mommy)!  I spray painted the large one gold before we glittered it.  


I recommend spray painting it first so if it chips it won't be that noticeable.  Then Mod Podge and glitter.  Let dry.  You could/should do a coat of clear spray paint over the glitter to help it from spreading glitter everywhere!  I'll do that to my elk.  


 I was hoping it would look like a beetle.  Kinda cool I think.


I saw a quote on Pinterest one day: "Glitter is the herpes of crafting".  Bahaha!  Spreads everywhere and you can't get rid of it!  So so true...about the glitter I mean.

                                                                    xo
                                                                Melanie

Monday, March 5, 2012

Noah's Nursery

We have two girls and a boy.  When we knew we were having a son, I couldn't wait to decorate a boy nursery!


This sign was hanging outside by my doorbell until a wind storm blew it off a couple of weeks ago.  It was a gift from a dear friend, it's way cuter than the masking tape I had over the doorbell!


I adore this paper and fabric garland.  I think it turned out just right, not too fancy and not too plain for a baby boy.  There are three layers of paper and the top layer is fabric that I adhered with spray mounting glue.  The medallions under the chipboard letters are also fabric as well as the ruffle at the top and the rosette at the bottom.  


The fabric garland on the wall is so easy to sew you can find the pattern from my friend Natalie's blog.  I figured out how to make the paper mobile on my own and it used to be hanging over his crib until one day he stood up, pulled it down and ate some of the paper!  


I cut out a loads of circles on my Cricut but you could do it just as easy with a circle punch.  Sew the circles together and hot glue the strips on a ribbon covered embroidery hoop rigged with dowel rods.  I think it finishes the room off....since I can't really have a chandelier  in his room, this gives it the same feel.


Every time I go into Noah's room, I smile.  It makes me happy to know I created a beautiful space for my son to grow up in.

                                                                    xo
                                                                Melanie